Showing posts with label My Projects. Show all posts
Wednesday, April 4, 2012
Cora's Nursery
I have been wanting to share pictures of Cora's nursery for awhile now, and WOW! it always feels good when I actually follow through on something! Hope you don't mind this picture-heavy post of my little girls' room. It is one of my favorite spaces in our home.
Her bedroom has a vintage feel, with many handmade items. Many things in her room were made by family and friends, or painted by me (the shelf and the rocking chair). Other items were found at thrift stores or ordered off of etsy.com. The wall paint color is a soft yellow called Summer Pear.
My artist friend Beth painted the wall art of the tree and owls. It is perfect for Cora's room and so special to have a one-of-a-kind piece like this! I added ribbon to the bird cage and it is a great place to keep Cora's hair clips.
The following mobile was made by my sister Debbie and her husband Andy. I love it! It makes the prettiest shadow on the wall. It really makes the room.
There are still more things I would like to do in this room, but I'm glad I captured it at this stage before our two-year-old moves to a big girl bed.
Thanks for stopping by! In the comments let me know your favorite part of her room. I'm so curious to know!
Monday, March 19, 2012
I love you, little miss TWO.
This little chickadee turned TWO.
The flowering plum trees are blooming pink, just like they were on the day, two years ago, when we brought Cora home from the hospital. The trees were on parade, welcoming our baby girl, in all their glory! Tim and I love that every year, at this time, the trees remind us of the precious gift that Cora is and how blessed we are to be her mom and dad. {Insert the boys rolling their eyes because we've told them the sappy story of the blooming plum trees one too many times. :) }
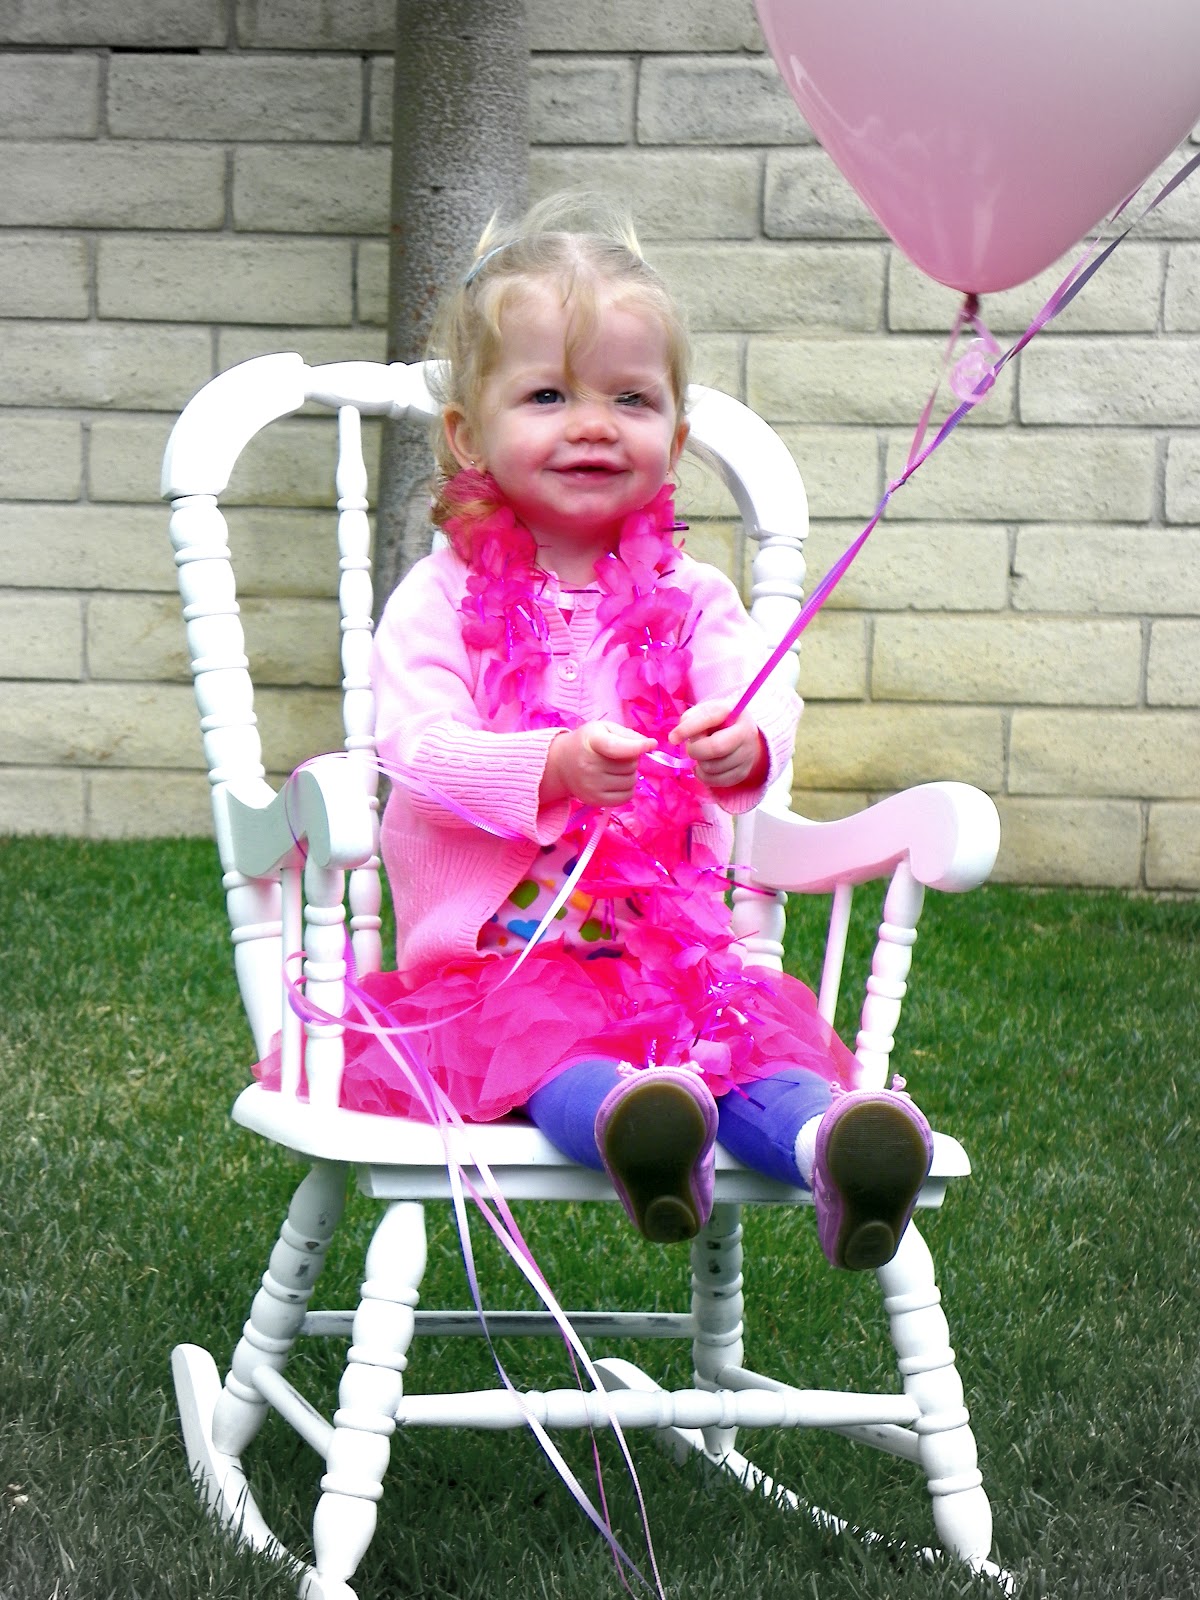
The rocking chair in the picture was my second find at the antique fair mall, mentioned in my last post {way back in January}. It was unpainted and looked dingy and dull...but a coat of white paint did the trick! It now hangs out in Cora's room waiting for her to sit and rock {like I found her quietly doing today} or for her to climb up in to look at a book. Her room has a vintage vibe, so it is the perfect addition. {Thank you D & K for the Christmas money that went toward purchasing this chair!}
One of Cora's favorite gifts was a tea set. She loves it and will happily serve tea to one and all. Stop by for a tea party any time.
Labels:
Birthday Celebrations,
Cora,
Milestones,
My Projects
Wednesday, January 25, 2012
Lego Display from Vintage Drawer
In my last post I mentioned that my friend and I had a fun day thrifting a few weeks back. We went to a local antique mall. What I didn't mention is that I made a few GREAT purchases there (two, to be exact)! I'd like to share one of my great finds and show you what I did with it.
I bought an old typeset drawer! Didn't take me long to figure out what I would do with my purchase. I knew it would be the perfect fun way for my boys to display their ever growing collection of lego figures!
I painted the outside frame of the drawer in a whitewash and distressed it (which I realize is hard to see in the pictures...). The inside of the drawers were already a dark brown, which I left alone. There were two funny knobs of on the drawer, which I removed...they had roses on them and just didn't "go". I do plan on adding a brass pull or something similar soon, so the drawer can retain a bit of it's old life. I'd like it to be obvious that the display was once a drawer, after all!
Toby and Asher were thrilled! They were inspired to organize their lego figures, connecting missing heads, with legs and shirts, hats, and other accessories. We hung it low enough that they can easily organize and reorganize to their hearts content.
Tuesday, January 17, 2012
One thing I do know...
One thing I do know: I really enjoy painting furniture. One thing I don't know: exactly where I'm going (and how God will lead) with this new hobby of mine. I don't want to keep taking from the family budget to fund my hobby, so I need to find a way to make a little spending cash along the way so that I can keep doing this thing I love. (I did sell a dresser I painted, which was really cool.)
When my parents were here over the holidays (Free babysitting!!! Thanks Mom and Dad.) I got to spend an afternoon with my good friend, Cammie. We stopped by a local antique fair mall (big warehouse divided in to booths where people sell their antiques/collectibles/junk) and got to talking with one of the ladies who was working in her booth. I mentioned I love to paint - she said she hates to paint. And apparently Lisa hates it so much she would pay someone to do her painting for her because ... I ended up agreeing to paint some of her pieces.
Getting paid to do something you love is a.w.e.s.o.m.e. Lisa picked up the first pieces I completed today and she was thrilled with the results. (Big sigh of relief and I might be blushing a bit.)
The table needed some TLC, but nothing some wood glue and putty couldn't fix. Plus, that's the great thing about this style of furniture. It doesn't have to be perfect. Any imperfections and we conveniently say it "adds character". I did prime, paint and wax this piece so that the table would be durable and easy to clean if food was ever placed on it.
The rocking chairs were so great. I miss them. Old, worn, comfortable. I wanted to keep them. I painted them in Annie Sloan's Chalk Paint in Pure White with a wax finish. By stenciling the pieces they immediately became a "set". Who wouldn't want to sit and enjoy some lemonade and cookies on these beauties?
Sigh. One thing I do know: I really enjoy painting furniture.
Wednesday, January 11, 2012
Child's Desk
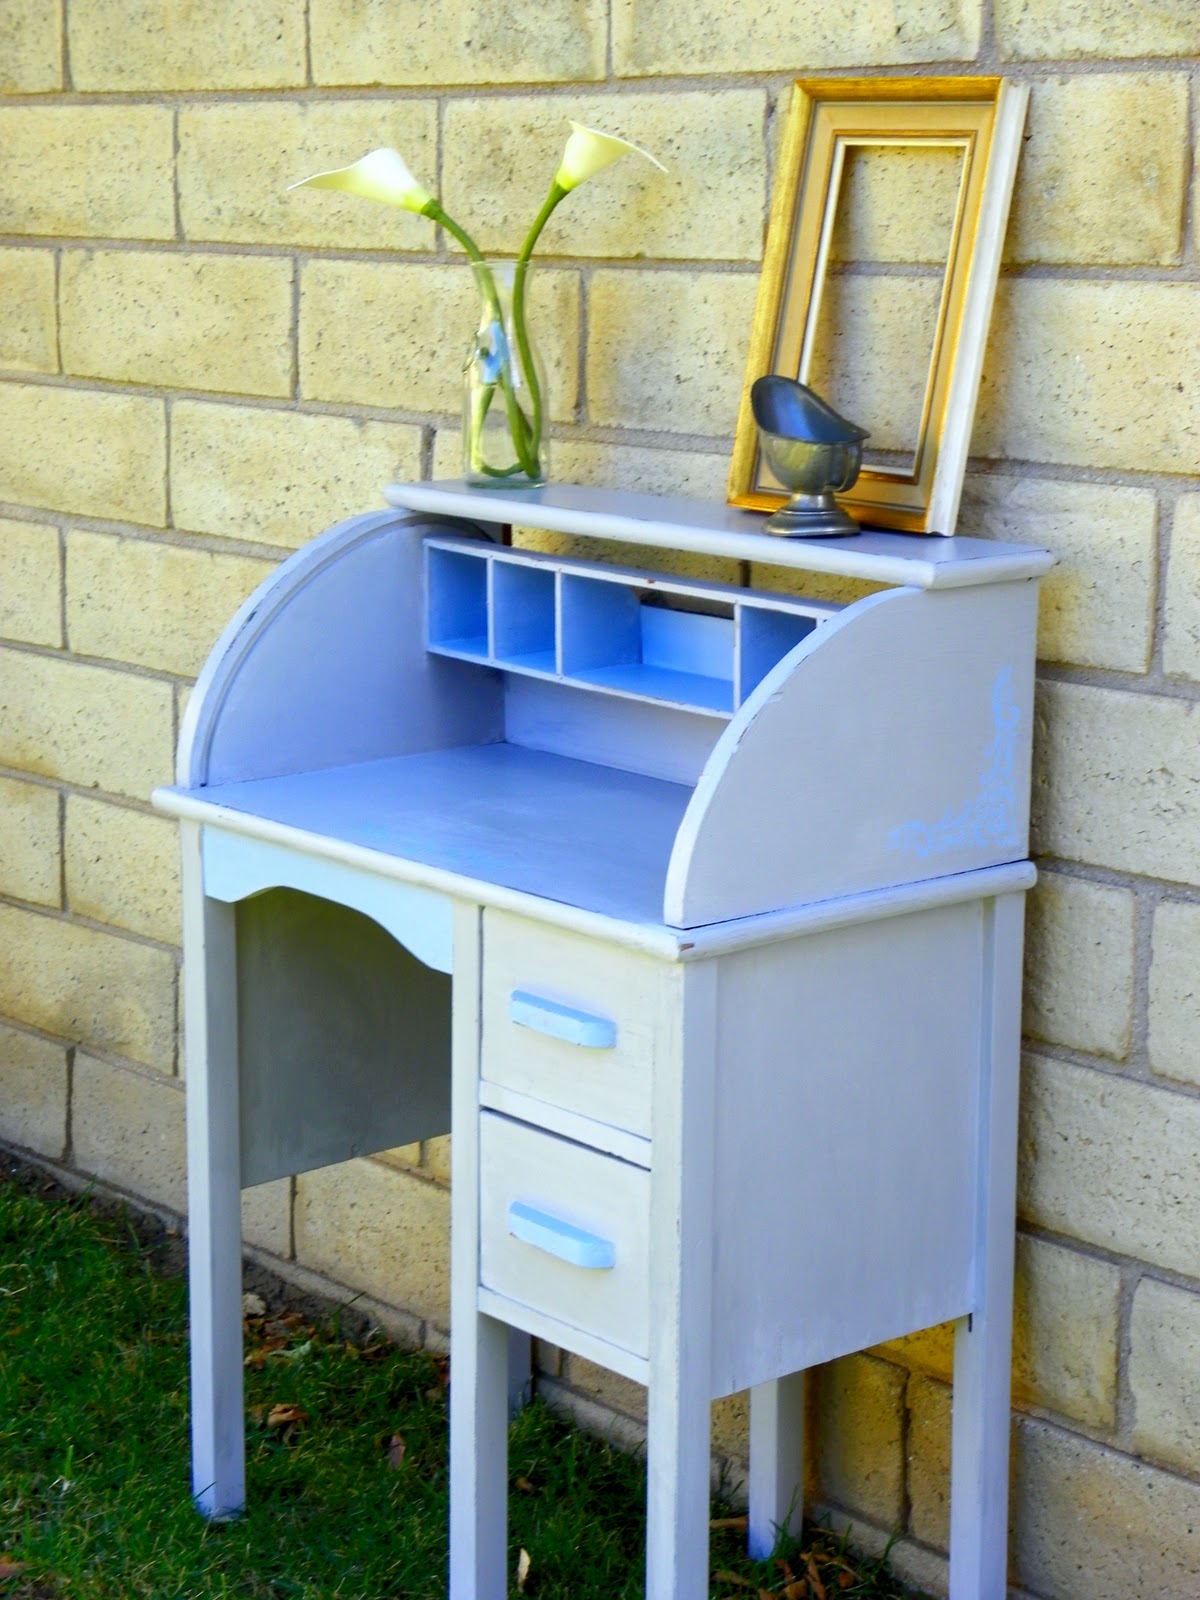
Isn't this small desk sweet? It was thrown in for free with some furniture I purchased off of Craigslist. It was dirty, broken {it used to be a roll top desk, but the roll top was beyond repair}, and painted in a dark brown. It was the perfect piece for me to try out some Annie Sloan's Chalk Paint on! I finally got my hands on this special paint and was excited to try it.
{picture via Perfectly Imperfect Blog}
I did give the desk a good cleaning, but otherwise there was no need to sand or prime! Wahoo! That is
chalk paint's claim to fame: you get right to the fun part and start painting. The base of the desk is painted
in Paris Grey and the inside of the cubbies and other accents in Louis Blue. I did a little stenciling on the side and desk top for some pretty detailing and, of course, distressed it to give it character.
So, here's to hoping that I will be posting more often in 2012! I am constantly working on projects these days, but don't always take the time to take pictures and share. Must.change.that.
Please leave a comment. It will make my day!
Wednesday, December 7, 2011
French Grey Bedroom Set
After painting a beautiful piece of furniture, I get such a rush. I get giddy, silly, and loopy. It is so much fun to be able to transform something as solid, permanent, and useful as furniture into something so pretty. My latest project was this bedroom set, which I painted in a light French grey and distressed for that vintage look I love.
I have a lot to learn about furniture, but I believe this dresser and headboard are French Provincial (correct me if I'm wrong!). I kept all the original hardware, but updated it by spray painting them in Rust-Oleum Metallic Charcoal. They are the perfect fancy finish on these pieces.
I can't get over the intact condition of the cane backing on the headboard! Don't you love those curves?
The bedside table is originally from Ethan Allen, but I painted it to match the set.
These pieces would be beautiful in a guest room. I would love to save it for Cora, but she is only 20 months and that would mean keeping it in storage a loooooong time. Alas, I have decided to sell this set and use the $$ to invest in other projects. Oh my, do I ever have a long list of projects...but that's what makes it fun!
I would love to hear your feedback!!
I have a lot to learn about furniture, but I believe this dresser and headboard are French Provincial (correct me if I'm wrong!). I kept all the original hardware, but updated it by spray painting them in Rust-Oleum Metallic Charcoal. They are the perfect fancy finish on these pieces.
I can't get over the intact condition of the cane backing on the headboard! Don't you love those curves?
The bedside table is originally from Ethan Allen, but I painted it to match the set.
These pieces would be beautiful in a guest room. I would love to save it for Cora, but she is only 20 months and that would mean keeping it in storage a loooooong time. Alas, I have decided to sell this set and use the $$ to invest in other projects. Oh my, do I ever have a long list of projects...but that's what makes it fun!
I would love to hear your feedback!!
Monday, November 21, 2011
Rustic Armoire
Just wanted to share one of my latest projects. A rustic armoire that now holds my crafting supplies! This piece is beautifying our guest room and helps me feel much more organized.
Below is the before picture. I got this piece from the same couple that sold me my hutch. They buy and sell estates and will be a great resource for me whenever I'm looking for a new piece of furniture. {I'm currently painting a bedroom set, also purchased from them, in a beautiful light French grey that I will be showing off soon!)
BEFORE
I whitewashed the cabinet and heavily sanded it, then sealed it with wax. I wanted the wood grain to show through and was aiming for a rustic/shabby look. The stencils are Martha Stewart Crafts purchased at Michael's. I love the detail the stenciling adds to this piece. I kept the original hardware, but did give it a fresh spray of Rust-Oleum Metallic Charcoal. All in all, I'm very happy with how it turned out!
All my crafty goodness in one place! You gotta love that!
Wednesday, October 12, 2011
Much prettier in white...
Here she is in all her glory! My new white distressed hutch. I still have to pinch myself that I was able to find such a pretty piece - in such great condition - for such a great price {I love you Craigslist!}. Painting her was the biggest DIY project I have attempted to date, but I am pleased with the results. She just might be the nicest piece of furniture in my house!
I am a rookie, but didn't want to make any rookie mistakes, so I did my research. This e-book was a huge help, so I'm glad I spent the $10 to download it. Below are the before and after pictures.
You can see that I kept the original hardware. I love how the handles and knobs pop now that they have a white canvas behind them. There are so many pretty details on this piece and a little bit of distressing really made them stand out.
Tuesday, October 4, 2011
Foam Pumpkin Gets a Book Page Makeover
As soon as I saw this idea in the October 2011 BHG Magazine, I knew I wanted to "try it at home": a foam pumpkin covered in book pages.
I purchased a foam pumpkin at Michael's for $4.49. {That was the price at 50% off - if any of you know where to get foam pumpkins for less, please share!} The book pages were from an old hymnal my sister picked up at a flea market.
I used a paint brush to apply glue to the pumpkin and covered it with smaller pieces of the book pages. Then I used the Mod Podge to decoupage the book pages. After everything was fully dry, I sprayed on the glossy finish, which is optional. I somewhat regretted spraying on the finish because I liked the previous matte look better. So if you like a matte look, skip the spray. If you like a glossy look, then spray to your heart's content. {Decoupage Hi-Gloss Finish also purchased at Michael's.}
This pumpkin will add a bit of vintage and a bit of fun to my home this fall. You will probably see it reappear on my hutch if I can finish painting it this weekend. So far it has been sanded, primed, sanded, and painted with a first coat. It looks so pretty already, but needs some more work. Can't wait to share! {I decided to go all white, by the way...still deciding if I'm going to distress it or not.}
Subscribe to:
Posts (Atom)